
A kitchen island can be the feature that makes your new addition feel finished, or the thing that quietly wrecks your workflow every day. In Columbus, we see the same pain point on walk-throughs, the addition adds square footage, but the island gets drawn like a furniture piece instead of a working zone with real clearances, power, plumbing, and venting.
If you're designing around products you've looked at through ferguson home, start with the hard part first, space planning and utilities. Once the island footprint and hookups are right, the finishes, cabinetry, and fixtures become the fun decisions, not expensive change orders.
Start with the Island's Job, Not the Shape
Most island mistakes happen before anyone picks a countertop. The island gets designed as "a rectangle that fits," not as a tool that supports how you cook, host, clean, and move through the room.
We like to define the island in one sentence before we draw it: prep island, seating island, cleanup island, or cooking island. You can blend jobs, but you need a primary job because each one drives different dimensions and utilities.
Here are the common "jobs," and what they require.
- Prep-first island: uninterrupted counter run, landing space near fridge and range, trash pull-out, and task lighting. Power helps for mixers and small appliances, plumbing usually optional.
- Seating-first island: knee space, durable overhang details, comfortable aisle clearances, and a plan for where backpacks, mail, and shoes land so the island doesn't become the drop zone.
- Cleanup-first island (sink or dishwasher): plumbing and venting constraints, waterproofing, and a plan for dish circulation so people aren't trapped in the work triangle during gatherings.
- Cooking-first island (cooktop): ventilation strategy, fire safety clearances, and a realistic plan for grease, splatter, and where hot pans land.
In Columbus additions, the island also has a fifth "job" that gets overlooked: it often hides the transition between the existing house and the new space. That can be great, but it means the island location has to respect structural beams, floor height transitions, and traffic paths to back doors, patios, or mudrooms.
Layout Rules That Actually Affect Daily Use
A kitchen island doesn't fail because the stone wasn't expensive enough. It fails because it blocks people.

We design islands from the aisles outward. Cabinet width is easy. Usable clearances are what make the kitchen feel calm.
Clearance Targets We Use in Real Kitchens
Exact dimensions depend on your home and appliances, but these planning targets keep most kitchens functional without feeling tight.
- Around the island (work aisles): aim for about 42 inches minimum in work zones. If you have two cooks, kids circulating, or appliances opening into the aisle, more space is usually better.
- Behind seating: plan for a wider aisle so stools can slide out and people can pass without turning sideways.
- Appliance door conflicts: check that the refrigerator, dishwasher, and oven doors can open without hitting stools or pinching the path to the pantry.
If you're expanding the kitchen as part of a Columbus home addition, don't assume the added square footage automatically fixes circulation. We often see an island "grow" to fill the new space, then the refrigerator and pantry end up too far apart, or the dishwasher blocks the main walkway.
The Work Triangle Is Real, but Zones Are Better
Classic kitchen planning talks about a work triangle between sink, fridge, and range. In practice, most families use zones.
A good island helps you create:
- A landing zone near the fridge for groceries and lunch packing.
- A prep zone with clear counter and a trash pull-out.
- A cooking zone with safe landing for hot pans.
- A cleanup zone where the dishwasher and sink aren't in the middle of the party traffic.
If you host a lot in Upper Arlington, Bexley, or Grandview Heights, a zone approach matters even more. People will naturally gather at the island. Your design should assume that, then protect the cooking path so you aren't squeezing behind stools with a pot of boiling water.
Utilities: the Part Most Island Plans Underestimate
In Columbus and Central Ohio, the island design has to match what the house can support, electrical capacity, plumbing routes, and sometimes venting options. This is where early contractor input saves real time and money.
Electrical: Outlets, Lighting, and "Hidden" Loads
Most islands need power for small appliances and for code compliance. Even if you want a clean, outlet-free look, you still need a plan that meets electrical requirements.
The National Electrical Code has requirements for receptacles serving kitchen islands and peninsulas. The rules have changed over code cycles, so the right move is to design your island with a clear outlet plan and confirm details with your electrician and local inspector. A starting reference is the National Fire Protection Association's overview of the NEC (NFPA, National Electrical Code).
Beyond outlets, we also plan for loads that sneak up on additions:
- Microwave drawers or built-in microwaves
- Beverage fridges
- Under-counter ice makers
- Multiple pendant lights plus recessed cans
- Pop-up chargers and under-cabinet lighting
If your addition includes a larger panel upgrade or new circuits, decide that early. It affects schedule and wall openings.
Plumbing: Sink and Dishwasher Islands Need a Real Route
Adding a prep sink feels simple until you look at how drains and vents get back to the existing plumbing stack. In a slab-on-grade or finished lower level, routing can be the entire project.
A few practical constraints we look for on walk-throughs in Columbus:
- Floor system access: Can we route drains and supplies through joists without compromising structure?
- Venting strategy: Island vents can be more complex than wall vents. Your plumber should propose a code-compliant path that fits your home's framing and inspection requirements.
- Waterproofing: Dishwashers and sinks belong over floors built and detailed to handle leaks, because someday something will drip.
If you want an island sink mainly for looks, think hard before committing. In our experience, an island sink becomes a constant visual clutter point unless you have a strong cleanup routine and smart accessory choices.
Ventilation: Cooking on the Island Changes the Ceiling Plan
A cooktop on an island usually forces a ventilation decision that affects the entire addition.
- Do you want a hood as a focal point?
- Can the duct run cleanly through framing to an exterior wall or roof?
- Are you trying to keep tall elements out of sight lines between the old house and the new space?
Sometimes the best answer is moving the cooktop to a wall and keeping the island as prep and seating. You get a cleaner ceiling, easier venting, and fewer grease issues in the middle of the room.
A Decision Framework: Choose the Right Island Type for Your Addition
You can design a great island in more than one way. The right choice depends on how your addition is laid out, what you're changing in the existing kitchen, and how you live.
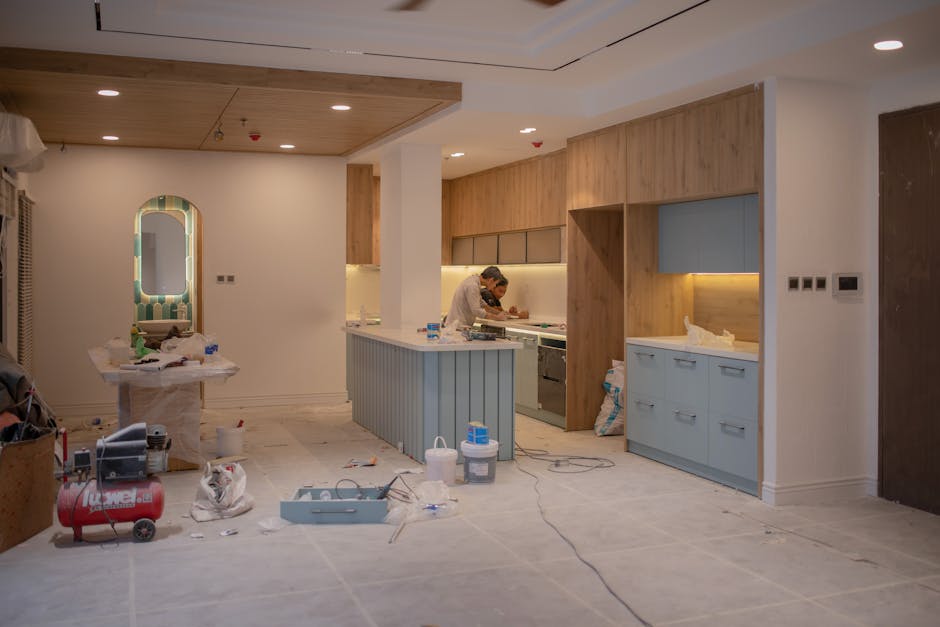
Option a: Prep-And-Storage Island (Most Additions)
Choose this if you want the island to make cooking easier without turning it into a utility hub.
Best fit when:
- You're expanding the kitchen footprint and want better workflow.
- You want more drawers, trash pull-outs, and countertop landing space.
- You want fewer plumbing and venting constraints.
Trade-offs:
- You may still need a separate beverage or serving area for hosting.
- If you skip seating, guests may hover elsewhere.
Option B: Seating-And-Serving Island (Entertaining Focus)
Choose this if the island is the social center, especially in open plans.
Best fit when:
- Your addition opens the kitchen to a family room or dining area.
- You host often in Dublin, Worthington, or Powell and want a place where people naturally gather.
- You want clear separation between cooking mess and guest space.
Trade-offs:
- Seating needs real aisle space, or it will feel cramped.
- Overhang details need to be engineered correctly for the countertop material.
Option C: Sink Island (Cleanup and Prep Hub)
Choose this if you want the sink to face the room and keep the perimeter cleaner.
Best fit when:
- You want to prep while looking into the living space.
- You have a strong plan for venting and drain routing.
- You're willing to prioritize function over "always photo-ready" surfaces.
Trade-offs:
- Dishes and soap are always visible.
- Plumbing routing can be the schedule driver, especially if the existing house wasn't designed for it.
Option D: Cooktop Island (High Impact, Highest Complexity)
Choose this if cooking is the event and you want the island to be the stage.
Best fit when:
- You have a clear ventilation plan that won't compromise the addition's ceiling design.
- You're comfortable with a hood or downdraft limitations.
- You want to keep perimeter walls clean for cabinetry or windows.
Trade-offs:
- Venting and makeup air considerations can push cost and complexity.
- Hot surfaces in a traffic area require thoughtful safety planning.
A lot of homeowners start with Option D because it looks great in photos. We often steer the conversation back to how the kitchen gets used on a weeknight, because a kitchen that photographs well but fights you every day isn't a win.
Worked Example: Designing an Island for a Columbus Addition
Here's a realistic planning scenario we see in Columbus.
You're adding onto the back of a home in Clintonville or Hilliard. The goal is a larger kitchen that opens into a new family room. The existing kitchen footprint stays partly in place, but the wall comes down and the room becomes open.
Your priorities:
- Seating for three to four
- Better prep space
- Storage for pots, pans, and small appliances
- A clean sight line from the old house into the addition
Step 1: Lock the Walkways First
We start by mapping the main traffic paths.
- Entry from the existing hallway
- Path to the patio door in the new addition
- Path from the fridge to the sink and range
The island can't sit in those paths. If it does, you'll feel it every day, especially with kids or guests.
Step 2: Choose the Island's Job
For this scenario, the best primary job is usually prep-and-storage, with seating as a secondary.
That keeps plumbing out of the floor and preserves flexibility for layout changes if we find framing or mechanical constraints.
Step 3: Build the "Package" Inside the Island
Before we talk finishes, we decide what the island contains.
A balanced package looks like:
- Deep drawers for pots and pans on the cook side
- A trash pull-out near the prep area
- A cabinet for a mixer or air fryer (with a nearby outlet plan)
- Seating side finished with panels so it looks built-in, not like a cabinet box
This is where choices you might make at ferguson home, faucets, sinks, lighting, coordinate with how the island functions, even if the island doesn't include a sink.
Step 4: Tie the Island to the Addition's Structure
In additions, island placement can intersect with:
- Floor framing direction
- New beams or posts
- HVAC runs that need to get from the existing system into the new space
We coordinate early so the island doesn't land on top of the cleanest duct route or force a last-minute soffit.
Step 5: Finish Decisions That Hold up in Ohio Homes
Columbus kitchens see wet boots, big temperature swings, and heavy daily use.
We push homeowners to think in terms of durability details, not brand names:
- Rounded or eased countertop edges where kids sit
- A seating overhang that's comfortable, but supported correctly for the countertop type
- Lighting that hits the work surface, not just the room
The result is an island that feels obvious once it's done. You can prep without bumping into stools, serve without blocking the fridge, and keep the cooking zone moving even when the house is full.
Common Island Mistakes We See in Columbus Additions
Most of these don't show up on paper until framing starts. If you watch for them early, you avoid redesigns mid-project.

Making the Island Too Big for the Aisles
A larger island isn't always better. If the aisles are tight, the kitchen feels smaller than it was before.
We'd rather design a slightly smaller island with comfortable clearance than a massive island that forces everyone into a single narrow path.
Forgetting Where Seating Actually Goes
Three stools look fine in a rendering. In real life, you need space for:
- stool depth
- people sitting back from the counter
- someone walking behind them to the pantry or fridge
If you don't plan that, the seating becomes decorative.
Treating Outlets as an Afterthought
Outlets get added late and end up in awkward places. Good island plans anticipate them early, then place them where they're usable and as visually clean as possible.
Choosing a Sink Island Without a Clutter Plan
If you want an island sink, decide how you'll manage the everyday items.
- where sponges and soap go
- where drying racks live
- where dirty dishes wait
Without that plan, the island becomes the mess center of the kitchen.
Designing a Showpiece Countertop with No Real Seating Support
Some countertop materials and overhangs require proper support. This is a structural detail, not a style preference.
We coordinate cabinetry, brackets, and substrate details so the finished island is solid and long-lasting.
How We Build It: From Walk-Through to Finished Island
A kitchen island touches multiple trades. In a home addition, it also touches structural and mechanical planning.
Our approach in Columbus is straightforward.
- Walk the space with you and map how you use the kitchen, not just what you want it to look like.
- Confirm feasibility for plumbing, electrical, HVAC, and framing before the island gets "locked in."
- Provide a clear written estimate tied to a defined scope, so you're not guessing what's included.
- Build and coordinate the trades, then finish with trim, paint, and final clean so the island looks like it belongs in the home.
If your project includes finishing space below the new kitchen, learn how we think about moisture, insulation, and long-term durability in our practical guide to basement finishing in Columbus.
If cabinetry is the biggest decision in your island design, our breakdown of cabinet choices for Columbus kitchens is a useful next read before you commit to door styles and storage layouts.
FAQ
Should My Island Have a Sink in a Columbus Home Addition?
It depends on how you use the kitchen and how the addition ties into the existing plumbing. A sink island can be great for prep and for facing the room, but it adds routing and venting complexity and it puts everyday clutter in the most visible spot.
On many Columbus additions, we prefer a prep-and-storage island and keep the sink on the perimeter unless the layout strongly supports an island sink.
How Many Seats Can I Realistically Fit at My Island?
Count seats after you plan clearances, not before. Seating needs comfortable width per person and enough space behind stools for traffic flow. If seating forces tight aisles, it will be used less than you expect.
We'll sketch seat count options during the walk-through so you can see what works in your exact footprint.
Can I Add an Island Without Moving Plumbing or Electrical?
Often, yes. A prep-and-storage island can avoid plumbing entirely, and electrical can sometimes be routed through the floor or nearby walls, depending on framing and access.
If you want appliances in the island (microwave drawer, beverage fridge), plan for dedicated circuits early.
What's the Best Countertop for an Island That Gets Heavy Daily Use?
The "best" countertop is the one that matches your maintenance tolerance and how the island is used. Some homeowners want low-maintenance surfaces, others prioritize a specific look and accept periodic sealing or careful cleaning.
We help you weigh those trade-offs during selection so the island holds up to Columbus life, kids, pets, and busy schedules.
Plan the Island Like Part of the Addition, Not a Separate Purchase
A dream island isn't just a cabinet order and a slab. It's clearances, lighting, power, and a layout that stays comfortable when the refrigerator door is open and three people are moving through the kitchen.
If you're planning a Columbus home addition and want the island to be the centerpiece that actually works, call Christopher Construction at (614) 905-4521 to schedule a free walk-through. We'll look at your space, talk through options, and put a clear written estimate in your hands.
Topics
- ferguson home
